
Twin‑screw extruders are the core equipment for manufacturing dry kibble cat food. During continuous production, residual meat meal, starch, fat and protein will stick to screw flights, barrel inner walls and die holes. Burnt deposits can build up after hours of high‑temperature extrusion (120–180°C), risking cross-contamination between batches, mould growth, off‑flavours and reduced equipment service life. A standardized cleaning routine, including routine purging and full disassembly deep cleaning, is essential for pet food hygiene and stable production.
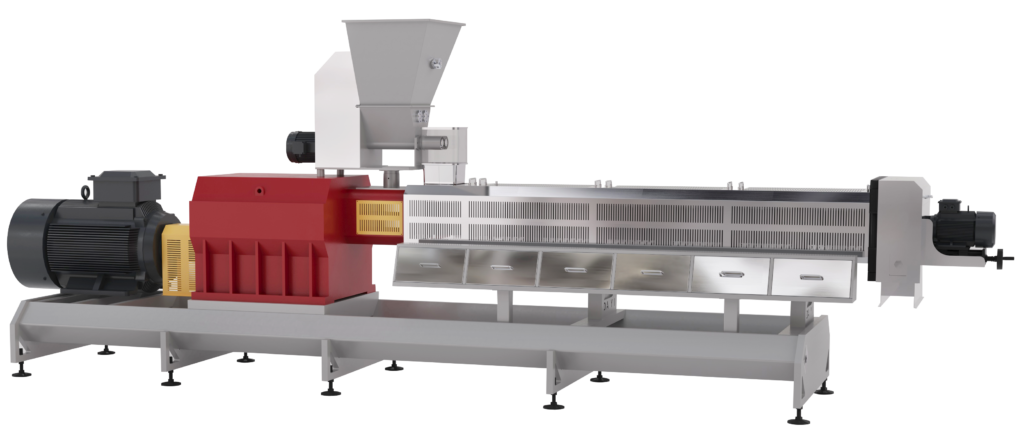
Pre‑Cleaning Safety Rules
Before any cleaning work, implement lockout-tagout (LOTO): cut off power, steam and water supplies to prevent accidental startup. Wear heat-resistant gloves, safety goggles and dust masks. Do not use compressed air to blow residual powder, as floating organic dust may create explosion hazards. Prepare food-grade neutral detergent, brass scrapers, brass brushes, nylon brushes, vacuum cleaner, soft cloths and a dedicated screw storage rack. Never use steel scrapers or steel wire brushes, which scratch the hard alloy surface of screws and barrels. Scratches form tiny crevices where organic residues accumulate and carbonize more easily in subsequent runs.
Step 1: In‑line Purging (No Disassembly, Routine Batch Change)
Purging is used when switching kibble formulas or finishing daily production to push out most leftover material without opening the machine.
- Stop feeding the cat food raw mix and shut down liquid fat injection. Keep barrel temperature at 110–130°C.
- Feed purge material, typically corn grits or rice flour, into the hopper. Run the twin screws at low speed of 15–25 RPM.
- Continue purging until the discharged material shows uniform colour with no dark burnt particles or leftover cat food fragments. This process usually takes 5–12 minutes, depending on machine size and fat content of the previous recipe.
- Stop feeding purge material, keep screws rotating for 2–3 minutes to empty the barrel, then reduce temperature and shut down the extruder.
Purging removes about 70–85% of surface residues, but it cannot eliminate carbonized deposits trapped in screw gaps and die openings. Full disassembly cleaning is required after 3–5 production batches or at the end of each production week.

Step 2: Disassembly
- Remove the cutter assembly first, then loosen die head bolts in a cross sequence to avoid plate distortion. Take off the die plate while it is still slightly warm for easier residue removal.
- Mark the sequence and orientation of each screw element by photos or tags before pulling out twin screws. Use a professional screw puller; never hammer screw components directly.
- Place the removed twin screws on a dedicated rack to protect screw flight tips from impact damage.
- Open barrel segments and vacuum loose powder residues inside each barrel chamber.
Step 3: Deep Cleaning of Individual Components
Screws and Screw Elements
Soak screw segments in 40–50°C warm water mixed with food-grade neutral detergent for 30–60 minutes to soften hardened fat and protein deposits. Use brass scrapers to scrape caked residues from screw roots and flights, then scrub grooves with brass or nylon brushes. For heavy carbonized buildup, use ultrasonic cleaning tanks with mild alkaline food-safe cleaner. After scrubbing, rinse thoroughly with warm clean water.

Barrel Segments
Inspect inner walls with flashlights. Use long-handled brass brushes and lint-free cloths to wipe every barrel bore. Check vents and steam injection ports carefully for trapped cat food paste. Rinse and drain all barrel sections.
Die Plate, Nozzles and Cutter Blades
Soak the die plate in warm detergent solution. Clear each small die hole with soft brass pins. Clean cutter blades separately to remove kibble crumbs and fat coating residues. All parts must be free of blocked holes and sticky organic residue.
Feed Hopper and Pre-conditioner
Vacuum all dry powder residues, wipe inner walls with food-safe wet cloths, then dry completely.
Step 4: Drying and Reassembly
All cleaned metal parts must be fully air-dried; residual moisture causes rust and bacterial growth. After drying, apply a thin layer of food-grade high-temperature anti-seize lubricant on screw splines and barrel sealing surfaces. Reassemble screw elements strictly following the original marked sequence. Install barrel sections and die plate, then tighten bolts evenly to manufacturer torque specifications.
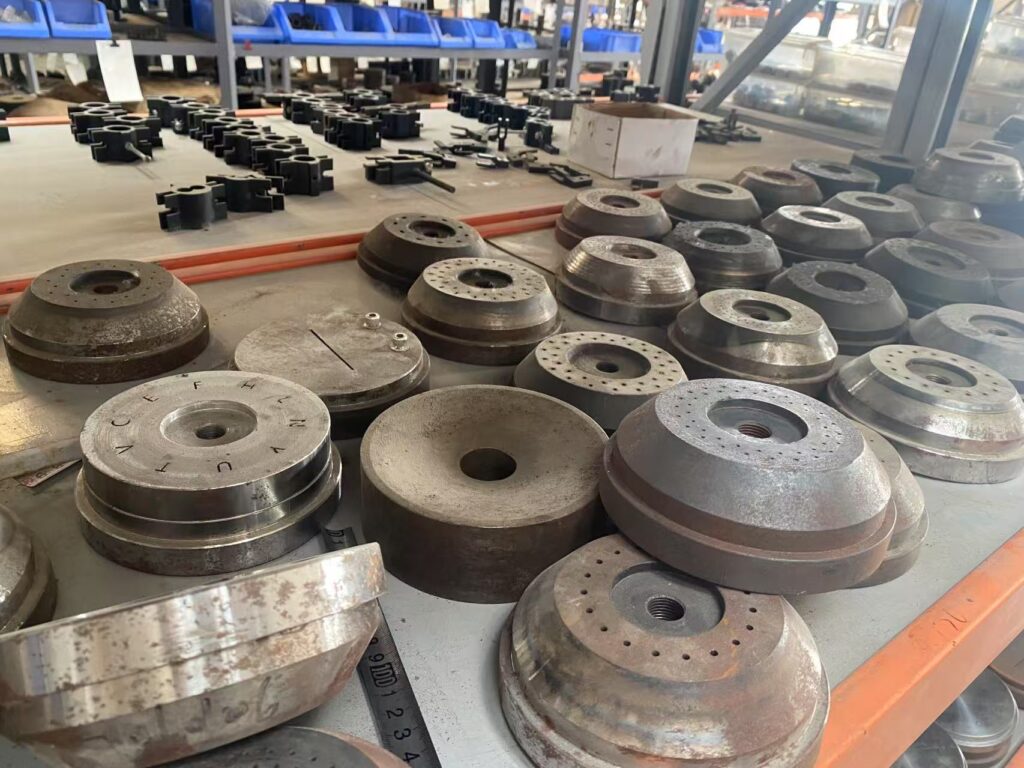
Step 5: Sanity Check and Trial Run
After reassembly, inspect all seals, connections and rotation. Run a small amount of purge material through the extruder for a 5–10 minute trial run. Check extrudate colour and smell to confirm no leftover old residues or burnt material before starting formal cat food production.
Maintenance Reminders
- Daily: purge the machine and clean die and cutter.
- Weekly: full disassembly deep cleaning.
- After high-fat, high-animal-protein formulas: shorten cleaning intervals, as fat and protein carbonize faster under extrusion heat.
- Record cleaning time, operators and inspection results for food safety traceability.
 Belarusian
 English
 Russian
 Spanish
 Italian
 Arabic
 Portuguese
 German
 French
 Japanese
 Moroccan Arabic
 Persian