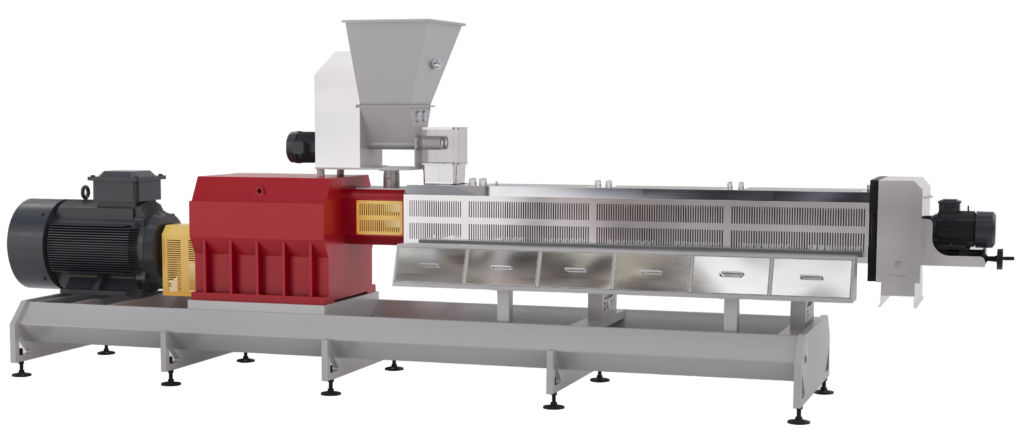
Twin-screw extruders are essential workhorses in the food, feed, and plastics industries, accounting for a significant portion of compounding machinery used globally. Regular cleaning is not just about maintaining product quality—it directly impacts equipment lifespan, production efficiency, and operational costs. Proper cleaning procedures can reduce downtime by up to 25% compared to reactive maintenance approaches. This guide provides a step-by-step approach to cleaning twin-screw extruders, covering daily maintenance, purging procedures, and deep cleaning methods.
Why Cleaning Matters
Residual materials left inside the extruder can carbonize, cross-contaminate subsequent batches, and cause product defects such as black spots, streaks, or off-flavors. In food and feed applications, uncleaned equipment can also lead to microbial growth and spoilage. Regular cleaning prevents these issues and extends the service life of critical components like screws and barrels by 30-40%.
Daily Cleaning (End-of-Shift Procedure)
At the end of each production shift, operators should perform routine cleaning to prevent material from hardening or carbonizing inside the equipment.
Steps:
Empty the feed hopper — Stop feeding material and allow the extruder to run until the barrel is empty.
Let the machine idle — Allow the extruder to run empty for 2–3 minutes to expel any remaining material.
Power down and disconnect — Turn off the main power and unplug the machine before beginning any manual cleaning.
Remove the die head — Disassemble the die head, orifice plate, and any other removable end components.
Clean external surfaces — Wipe down the machine exterior, removing dust, grease, and debris.
Clean the conditioner — Remove any residual material from the preconditioner (if applicable).
Inspect fasteners — Check and tighten all connection bolts and inspect wear parts.
Clean removed parts — Use brass or copper brushes (never steel tools) to clean the die head, orifice plate, and other disassembled components.
Purging Method (Online Cleaning)
For routine color changes, material transitions, or short-term shutdowns, purging with a cleaning compound is the most efficient method. This method cleans the barrel and screws without full disassembly.
Preparation:
Set all barrel heating zones to the appropriate temperature for the cleaning compound—typically around 200°C.
Reduce screw speed to 15–25 RPM and maintain until melt flow at the die tip stops.
Purging Procedure:
Stop feeding — Close the feed plate at the bottom of the hopper.
Add purging compound — Manually add the cleaning material (resin, polymer purge compound, or food-grade cleaning agent) through the feed opening.
Extrude the purge material — Run the screws at low speed (maintain below 20 RPM) until the extruded material matches the color and consistency of the purging compound.
Monitor pressure — Keep an eye on extrusion pressure to ensure it does not become too high. In high-pressure die applications, you may need to remove the die head to reduce pressure risk.
Complete the purge — Once the purge compound has fully displaced the previous material, stop the screws.
Final rinse — For food-grade applications, follow up with a second rinse using food-grade cleaning material before switching back to production material.
Remove residual cleaning material — Open the die head, rotate the screws, and remove the orifice plate to drain any remaining washing material from the barrel.
Deep Cleaning (Full Disassembly)
For thorough cleaning—especially when dealing with carbonized residue, after extended operation (every 3 months or 1,000 hours), or when switching between incompatible materials—complete disassembly and manual cleaning is recommended.
Removing the Screws
Work while hot — If possible, remove screws immediately after use while they are still warm, or reheat the screw assembly in the extruder for about 20 minutes. Heat makes disassembly significantly easier.
Support the shafts — Ensure the screw shaft assemblies are supported at enough points to prevent bending during removal.
Remove screw tips and elements — Unscrew the tips and slide elements off the shaft onto a raised table or cart positioned at the end of the machine.
Stuck elements — For elements that are difficult to remove, use a rosebud acetylene torch to heat evenly around the element without letting it change color (discoloration indicates the metallurgy has been compromised). Use a punch made of wood, hard plastic, aluminum, or brass to push elements from the shaft.
Work one at a time — Remove elements one by one, brushing or scraping the exposed shaft clean as you go.
⚠️ Critical Safety Note: Never use acetylene flame to clean screws—acetylene reaches approximately 3,000°C and will destroy the metal properties and mechanical tolerances of the screw.
Cleaning the Screw Elements
Initial brushing — Perform an initial cleaning with a steel wire brush or copper gauze as elements are removed from the machine.
Oven or fluidized bath — Place elements in an oven or fluidized bath for deeper cleaning. Do not exceed the temperature rating of the metallurgy.
Stubborn carbonized residue — For black, baked-on degraded material that brushes won’t remove, use mechanical abrasion: a stiff steel wire brush wheel on a bench grinder, a belt sander, or sandblasting/dry-ice blasting.
Clean keyways and splined bores — Ensure all internal surfaces are free of debris.
⚠️ Tool Restriction: Never use steel knives or scrapers to clean screw surfaces—use only bamboo, copper, or brass tools. Steel tools can scratch the alloy or chrome plating, leading to increased material adhesion and accelerated wear.
Inspection
After cleaning, thoroughly inspect each element:
Check for hairline cracks — Elements with cracks should be discarded immediately, as they can break apart during operation, twist shafts, wreck barrels, and cause catastrophic gearbox failure.
Check for nicks and gouges — These may develop into cracks over time. Smooth them out gently with a fine file or grinding disc.
Surface finishing — Use 320-grit sandpaper on a flat surface (marble slab or steel plate) to smooth element end faces in a figure-eight pattern.
Document wear — If tracking wear rates, measure dimensions with a micrometer and record the data.
Cleaning the Barrel
Use approved cleaning agents to clean barrel surfaces.
For food-grade or medical applications, use food-grade cleaners (such as food-grade alcohol) and rinse with pure water afterward to avoid contamination.
Consider barrel polishing every 6–12 months to maintain optimal surface finish and reduce material buildup.
Reassembly
Apply anti-seize compound to screw shafts and components during reassembly.
Ensure proper positioning of all components on the shaft.
Verify that gearbox output shafts and couplings are in the correct position before reinstalling.
Emergency Shutdown Cleaning
In the event of an unexpected power outage or emergency stop, twin-screw extruders have a significant advantage over single-screw designs due to their self-cleaning:
Immediately remove the die head and slowly discharge material from the barrel.
If the screws won’t turn, heat the barrel heating elements to approximately 200°C and allow the residual material to carbonize.
Once you smell carbonization, restart the machine to expel the carbonized material from the puffing chamber.
Gearbox Maintenance
Gearbox cleaning should be performed during scheduled maintenance intervals:
Drain oil while hot — Drain the gearbox oil immediately after operation while it is still warm.
Open the gearbox cover and manually clean residual oil sludge and contaminants from the gearbox.
Replace the oil filter element.
Flush with diesel — Pour 20–30 liters of diesel into the gearbox, manually rotate the input shaft, and clean repeatedly two to three times.
Refill with fresh lubricant to the proper level (at least to the center of the oil sight glass or the output shaft centerline).
Change gearbox oil every 500–1,000 operating hours or every one to two months, depending on usage frequency.
Safety Precautions Summary
Hazard
Precaution
Burns from hot components
Wear heat-resistant gloves
Eye injury from debris
Wear safety goggles
Sharp screw edges
Handle carefully; components have sharp edges
Slippery surfaces
Wear non-slip footwear
Electrical shock
Disconnect power before manual cleaning
Chemical exposure
Use appropriate cleaning agents; avoid corrosive chemicals on screw surfaces
Noise from impact tools
Wear hearing protection when using impact hammers
Summary Checklist
[ ] Daily: Empty hopper, remove die head, clean exterior and conditioner, inspect fasteners
[ ] Per changeover: Purge with cleaning compound at 200°C, 15–25 RPM
[ ] Every 3 months/1,000 hours: Full disassembly, deep clean screws and barrel, inspect for cracks and wear, service gearbox
Regular, systematic cleaning of your twin-screw extruder ensures consistent product quality, minimizes unplanned downtime, and maximizes the return on your equipment investment.





 Spanish
  English
  Russian
  Italian
  Arabic
  Portuguese
  German
  French
  Japanese
  Moroccan Arabic
  Persian
  Belarusian